Thursday 5 December 2013

GRP rear boot box

The rear box was missing from the original build. I am trying to update the car and give it a new look so decided to fit a boot box. I probably won't be going on any long runs with the car but somewhere to store a few tools and a few odd and ends like a puncture repair kit would be useful.

Thanks to Julian from Aerodynamix who sold me a s/h boot box for £25 I was able to a) ascertain that the standard Westfield box did not fit may car and b) Because of the overall poor fit the Playskool part was unlikely to be any better. Why pay full price for something you are going to hack about.  My bodywork is definitely off a very early wide body and not many after market accessory panels fit it.

The standard box from Westfield has now been hacked around to fit (more or less). I put together a prototype together with "structural duct tape" and posted the results on Facebook and achieved the usual helpful comments (not). I have now cut up some GRP (PC board) sheets to blank off the ends where the roll cage transcends the bodywork.

To make the now custom boot box fit at the sides of the early bodywork I used the tub to cast the resin and filled it with matting. Hope it comes out?!

Contents

There is a contents page Link

Early prototype "structural duct tape"
Side fit
Rear fit

 
Here is the box reassembled with POC boards used to fill in the gaps.

Custom box takes shape

Gap filling resin with added heat

Finished - coat of paint


Tuesday 26 November 2013

Competition towing loops and timing strut etc

Towing hoop

I am not predicting the need to be towed off any tracks in the near future but just in case, as I had the time during this restoration, I decided to add them front and back. I thought long and hard about how to attach them. There is little guidance for 7 style cars despite trawling the forums. Most appear to favour the TRS type towing loop (as I have used) but attached to the wishbone suspension bolts. In my opinion this could be hazardous to the bodywork if a change in direction is required and the tow rope is on the wrong side. I also plan to use this for getting the car on to the trailer bed, The winch gets fouled if  the line is attached to one side or other of the suspension.

I elected to make some custom brackets and attach them to the chassis strong points, in the middle and with no bodywork obstructions. I used a press stud to keep the loop out of the way when not in use. The TRS loop could be removed for road use. The TRS loop is held in place with an M12 bolt + lock nut.

Contents

There is a contents page Link

Front loop

Rear loop

Timing Strut

Should I get brave enough to enter a MSA rules hill climb/sprint then I guess I will need one of these.

etc

The bulkhead had at least three points of entry into the cockpit for any fluids.

* The battery box (which has been moved)
* The clutch master cylinder
* The foot rest

The clutch master is an odd device, it does not look like a car or bike part. I guess that will be a challenge to find spares should it fail. It has an unusual bespoke attachment method to the bulkhead which leaves a gap. I managed to find a rubber boot from RS components that seals this up nicely. I must find out which parts bin it is from.


Sunday 17 November 2013

Reversing Light

One of the things that did not work when I got the car was the reversing light. I was going to upgrade these lights to LED's  from Europa Spares (as they are modern compact little units). When I came to swap them over the reversing light had the wires disconnected. When I removed the transmission tunnel cover to find out where they should be connected there was nowhere for them to go. Now this car has an electric reverse (in the transmission tunnel) and Westfield had obviously made no provision for a reversing light switch. I pondered the insanity of wiring it up or leaving alone. Obviously it is not an MoT or IVA issue otherwise it would have been wired at some point.

Do I need one, and how should it operate if I had one?

* It balances up the light clusters at the rear
* It warns other road users of your intentions.
* Illuminates your trajectory
* Possibly useful in the pit lane.

On balance I decided to do something about it (unlike the previous owners).

I used a motorcycle brake light switch and attached it to the reversing leaver such that as soon as you move it the light comes on simple!

Contents

There is a contents page Link


Reverse light switch fabrication

Tuesday 12 November 2013

Exhaust

The problem with the exhaust, as perceived by me, is  mainly down to noise level. However in order to pass the MSA scrutiniser it also has to be less than 99dB and have a Catalectic converter . When I purchased the car it was very noisy (even for me), however by experiment fitting some wadding brought the noise level right down. For track use, the car must have a cat being first registered in 2009. There is not much room in a Megabusa to fit a CAT so it has to take up some of the space in the exhaust. I found a 100 cell sports CAT at Demon Tweeks for £138.00. I then welded it into the front access plate of the existing exhaust. The theory being what I loose in space I gain noise attenuation with the CAT. Overall the exhaust is much quieter.

After some consideration of the appearance of my welding I decided to have it blasted (at Aliblast) and painted with high temperature paint.

Contents

There is a contents page Link


CAT welded in place

Demon Tweeks part
After blasting and painting

Reference: http://www.demon-tweeks.co.uk/motorsport/universal-exhaust-parts/custom-chrome-racing-stainless-sports-catalytic-converter

Saturday 2 November 2013

Paddle shift

I hate the gear change on a bike engine bike gear box combination. It has the advantage of a sequential shift however it comes at a cost. It is always a bit of a hit and miss with me as I am not good at changing down without clunking the box. Ideally you have to interrupt the power on the way up and you have to match the gearbox to engine speed on the way down by blipping the throttle. This type of box is usually referred to as a DOG box. If you want an explanation see:

http://www.dansmc.com/gearbox.htm

As the Bike engine/gearbox combination is usually under more strain when installed in a car, reliability can be an issue with these boxes. The way out of all this in my opinion  is two fold:

1)  Fit a paddle shift

2) Fit a Flatshifter

The Flatshifter is a computer/ECU that specifically adds to your existing ECU the capability of clutch less up and down shifts.

I have just completed the firs part of the challenge by installing a paddle shift from AB Racing. This paddle system is cable operated and gets a good reputation in the racing world.

Several parts had to be fabricated or modified:

* Engine mount bracket designed, fabricated and brass spacer for the gear leaver turned to  restrain the cable at the engine end.
* Bracket at the steering column to restrain the cable at the other end as it is a push pull mechanical system.
* Modification of the gimbal mounting tube on the steering column as the slotted holes for my application (Austin Alegro column) are 90 degrees out.
* Nylon bush spacer as the paddle tube is 40mm ID and the Alegro column is 31.5mm. This part was turned on a lathe.
* New switches for the indicators, dip-main and horn had to be installed as the space taken up by the one piece unit from the Alegro is needed for the paddle shift.
* Old transmission tunnel parts to be removed and tunnel hole filled in. The weight saving in this operation alone is considerable.

* Shorten the steering column and weld on the quick release spigot.

Needless to say all this took some time and effort.

This exercise has at the minimum. a) Tidied up the horrible Westfield gear change in the tunnel
b) Provided a route for the possible Flatshifter. c) Added back the steering quick release at the correct distance for my driving position.

References

Link to AB racing: http://www.abperformance.co.uk/default.aspx
Paddles: http://www.abperformance.co.uk/products.aspx?cat=17
Flatshifter: http://www.abperformance.co.uk/products.aspx?cat=18

Paddle shift + tunnel tidy up

Steering column welded


Steering column bracket
Engine end bracketry

Friday 18 October 2013

Battery, stone guards and closing panels

Battery

The bulkhead as viewed from the engine compartment, is not a tidy example of Westfield design. For reasons of space the battery, solenoid and isolator switch were all placed in or near the nearside bulkhead. With the introduction of reasonably priced compact sealed race batteries then it is time to clear away the clutter from the bulkhead and passenger foot well not to mention any weight reduction.

The battery is now housed in the nose cone on it's side (as sealed LA batteries can be). It is canted at a slight angle to assist removal at short notice. The associated electrics have be repositioned near the battery to reduce any voltage drops and ensure the car starts under all conditions. The reverse motor take-off cable had to be lengthened. The battery isolator is now attached to the engine mounting. The cleaned up bulkhead will be further enhanced at a future date.

Closing panels

The original builder obviously did not intend to come off the track. I don't know about other tracks but Knockhill runoff areas are full of pea gravel. This has the ability to get everywhere especially in any blind sections that are not closed off. One such section is just in front of the rear wheels. Once I had emptied the void of sand etc I made up closing panels and sealed them up with silicone.

Stone chip guards

I fitted some Carbon Mods stone chip guards. I am not entirely happy with the fit. This is the second lot they sent and they don't fit that much better. I guess the early stage of the bodywork is showing in terms of parts availability.

Contents

There is a contents page Link


Original as purchased


Bulkhead cleared now in nose cone


Monday 14 October 2013

LED Lights upgrade

The appearance of the car in my opinion is let down to some degree by the rear aux lights. The rear hazard and reverse lights stuck out by about 80mm and one had previously had a knock and was cracked. The front of the car lacked any daytime running lights. All of the lights were obtained from Europa spares. They are all high intensity LED's so the power consumption is a non issue.

Contents

There is a contents page Link


Friday 11 October 2013

Transmission tunnel

When I was fitting the near side (passenger) seat runners I noted the GRP cover over the transmission tunnel was not fitting correctly. There was some obstruction underneath near the reverse mechanism that was causing the problem. This problem is of a trivial nature but seeing the GRP cover was held on with two screws I though I would have a look at how this part of the car works. This is an early Megabusa chassis made in 2004, and I know they changed it in this area on later models so I thought it was worth a look.

The previous owner to his credit had spent a significant amount of money restoring this area and it was pleasant to reveal that he had indeed had had good value for the money spent. All the mechanicals are in perfect condition.

At least now I know what is in there and have no fears about it failing unpredictably. I think it is a good arrangement provided care is taken selecting reverse.

It is basically a motor bike starter (by the looks of it) and there is a cog on the interface with the diff flange which engages with the motor via a fabricated gear box (presumably by Westfield). I have downloaded some pictures so I can have a record of the investigation. The bad fitting of the GRP tunnel cover was due to a badly routed wire to the motor (5 minutes work). The problem with engagement is there is no synchronising mechanism. You have to develop your own strategy (mine is still to be perfected).

Plans

Although this is not a priority at this stage I am giving some thought to adding a paddle shift gear change and removing the existing linkage. The existing gear selector is an ugly feature on that car. This will require an upgrade to the tunnel housing. Also the reverse mechanism has no provision to turn on a reversing light although one is present on the car.

Contents

There is a contents page Link

The rubber boots need refreshing being badly cracked.
Gear selector

Handbrake boot

Reverse drive gear

Reverse motor

Reverse solinoid

Reverse selector gear

View towards engine


Wednesday 9 October 2013

Mud flaps, wing stays, shocks and aero screen

Current state

Wing stays

The existing wing stays have produced stress marks on the cycle wings GRP finish, this can take several years. I intended to fit mud flaps this unfortunately would make the cracks propagate even further. Most of the stone chips are from the front wheel so it makes sense to fit mud flaps.

Mud flaps

For the mud flap material, I choose a product called Diaprene (from Demon Tweaks) an almost indestructible plastic material specifically designed for flaps.  The mud flaps are easy to cut and can be wedged under the extra wing stay. I may choose to repaint the cycle wings at some stage.

Shocks

The shocks are from Protech and are very light weight and look smart. I have some for the front as well. The rear ones were in very poor condition. The weight saving alone must be significant, the Aero shocks were steel bodied.

Aero screen

The existing aero screen is too small for road use. I have fitted a nice little number from http://www.aerodynamix.co.uk/ I fitted the new aero screen over the top of the existing one which gave extra support. It remains to be seen weather the MSA rules are ok with this fitting. In reality the screen has made little improvement to wind ingress. I may try half doors to effect an improvement.

Contents

There is a contents page Link

Diaprene mud flaps


upgraded wing stays
Rear shocks

Aero screen


Saturday 5 October 2013

Contents

Westfield Megabusa upgrade


2009 Megabusa Oct 2013


Megabusa 2015

See also: http://sylvabuild.blogspot.co.uk/

Date              Title / web link
Key words
5th Oct 13   
Contents              
History, faults etc  
9th Oct 13
Mud flaps, Protec Shocks, Aero screen
11th Oct 13
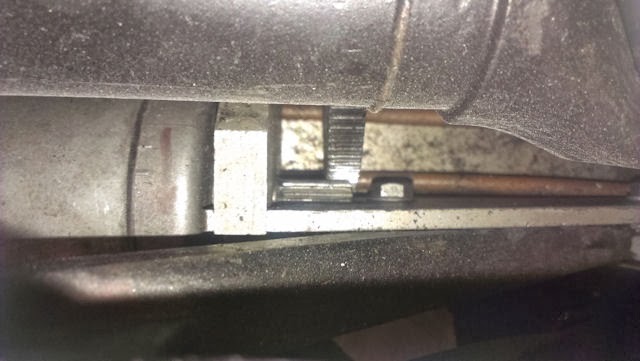
Investigation, reverse box, gear change etc
14th Oct 13
LED Europa spares
18th Oct 13
Move battery, Rear stone chip protection, rear closing panels
2nd Nov 13
AB Racing paddle shift install
12th Nov 13
Making the exhaust comply, noise, CAT
17th Nov 13
Automatic reverse lamp
26th Nov 13
More MSA requirements
5th Dec 13
Rear storage
10th Jan 14
Oil catch tank mods
22 Jan 14
Roll cage and side doors
27th Jan 14
Attaching the GRP half doors

04th Feb 14
Finishing touches, boot box lid
12th Feb 14
Gear selected indicator
20th Feb 14
Adding places to put competition numbers etc
18th Mar 14
ARB install
20th Mar 14
Cooling fan upgrade
27th Mar 14
Summary and comments so far
11th Apr 14
Tonneau and rear view mirror
1st May 14
DRE shift lights
7th May 14
Return from Stoneleigh with new headlights
3rd Jun 14
Remap the Power Commander
10th Jun 14
Carbon Copies made custom wings
19th July 14
New seats, crotch strap and HANS device
4th Sept 14
New Dynalites + vented discs and Oil warning
11th Sept 14
Resolving problems with fuel overflow
15th Oct 14
Better clutch control at the start line
31st Oct 14
Improved air flow to oil cooler
12th Dec 14
Improved heat protection exhaust exit
22nd Dec 14
Reducing weight of battery (8Kg)
13th Feb 15
Reducing weight of hubs and carriers (8Kg)
20th Feb 15
Carbon bonnet (3Kg)
22nd Feb 15
Progress report 2015


I wanted a car more tuned for track day events and hill climbs. I settled on a Westfield Megabusa as the car of choice as they do hold the money on the second hand market and go like hell. I have just built a Sylva J15 and I expect the depreciation on that to be extensive and I did not wish two cars in the stable to be dipping away at my daughters inheritance.

I fixed on the specific car, shown above, it has one or two restoration/repair opportunities and it was being sold below it's potential market value because of the reported problems. I also needed a project for the winter of 2013/14.

It is a YR2009 car registered on a Q plate. The chassis is an original Westfied Megabusa  manufactured in YR2004. It is a wide body with fixed wheel arches and fully rose jointed.  The engine was manufactured in ~YR2000. The car has been painted in two pack red. It is a nice car and looks very presentable.

I have had the car for a month now and here are the list of problems most of which were reported by the previous owner and of a trivial nature.

* Differential making a noise under deceleration: Loose bolts
* Differential breather not attached, spraying oil on casing: Added pipe.
* Light switch intermittent: Corroded switch replaced with second hand part
* Bezel around instruments falling off: Tiger Seal used to reattach
* Offside rear light lens broken and some bodywork damage in the same area: See bodywork repairs
* Fuel gauge not reading accurately: Sensor had never been adjusted to tank when installed.
* Stone chips both sides of rear mudguards: See bodywork repairs chips no longer present.
* Clutch slave cylinder leaking: Replaced seal and honed cylinder. See picture.
* Intermittent instrument lights and sticking temperature gauge: Not done yet low priority
* Seat backs  separating from main body of seat. Also can't reach the pedals due to fixed location: Repaired seats and installed adjustable runners see picture.
* Exhaust too loud (>99dB), can end cap cracked around input pipe, no rubber mount at tail fixing, also future MSA scrutinising issue: Welded cracks and replaced wadding. New CAT needed to comply with MSA rules.
*Nearside rear shock absorber leaking: Replaced see picture.
* Steering wheel too close now that seat is in the correct driving position: Made up new spacer and removed quick release for now. May have to revisit this issue once full roll cage is installed.
* Fuel swirl pot bracket broken, pot moving about with engine vibration: New bracket made and glued on (as welding it was too complicated for now).

First repairs


The car runs exceedingly well and has blistering performance (not of this world) even before most of the above repairs were put in place. The majority of the repairs took less than a day or two however the bodywork restoration took a few more.

The bodywork was relatively easy to repair the car having a two pack finish and made of GRP.

Hewland slave cylinder

AVO shocks

offside rear body damage

Repainted
Stone chips removed

Seat repair

New runners welded up

Future plans

My intention is to hill climb the car on some of the Scottish tracks to MSA rules. I also want to enhance some of the features.

* Full roll cage
* Tow points, trip vane and signage
* CAT (more discussion on this).
* Upgraded aero screen
* Extra cycle wing stays to support front mud flaps
* Carbon effect stone chip guards for rear mud guards

Emissions

This is a difficult area for a bike engine car. Production cars had ECU's and CAT's since the late 90's with engines and ECU's designed to meet the test. Bike engines were not fully compliant with this technology till about 2008. These developments were brought about because the emission standards were lowered. This is expressed by the Lambda ratio of un-burnt fuel to oxygen being in the range of 0.97 - 1.03. This car was  no exception and passed this lower limit in 2009 at the IVA test (it says so on the log book). I am not sure how it did pass as it would not pass that test today as there is no CAT present. If a CAT were present the Hayabusa ECU of that age (YR2000) cannot support such a device.

The MoT is not a problem as Q plated cars with a bike engine are subjected to a wider limit because of the above issues with bike engines emissions.

The MSA rules state that a CAT must be present on a 2009 car (I think this is called catch 22 is it not?).

Some have said just add a CAT and forget about the ECU. Fitting a CAT with no ECU to control will not maintain the correct temperature. An over fuelled BEC can melt a CAT I am told! I am going to fit a CAT and see where it leads.

Credits

Angus:Who applied the top coat of paint, thanks for the time.
Matt: Who supplied some of the s/h bits.
Gerald: Who helped me pick up the car on a trailer.
Aliblast (Alastair McGill) who fixed the slave cylinder.