Tuesday, 26 November 2013

Competition towing loops and timing strut etc

Towing hoop

I am not predicting the need to be towed off any tracks in the near future but just in case, as I had the time during this restoration, I decided to add them front and back. I thought long and hard about how to attach them. There is little guidance for 7 style cars despite trawling the forums. Most appear to favour the TRS type towing loop (as I have used) but attached to the wishbone suspension bolts. In my opinion this could be hazardous to the bodywork if a change in direction is required and the tow rope is on the wrong side. I also plan to use this for getting the car on to the trailer bed, The winch gets fouled if  the line is attached to one side or other of the suspension.

I elected to make some custom brackets and attach them to the chassis strong points, in the middle and with no bodywork obstructions. I used a press stud to keep the loop out of the way when not in use. The TRS loop could be removed for road use. The TRS loop is held in place with an M12 bolt + lock nut.

Contents

There is a contents page Link

Front loop

Rear loop

Timing Strut

Should I get brave enough to enter a MSA rules hill climb/sprint then I guess I will need one of these.

etc

The bulkhead had at least three points of entry into the cockpit for any fluids.

* The battery box (which has been moved)
* The clutch master cylinder
* The foot rest

The clutch master is an odd device, it does not look like a car or bike part. I guess that will be a challenge to find spares should it fail. It has an unusual bespoke attachment method to the bulkhead which leaves a gap. I managed to find a rubber boot from RS components that seals this up nicely. I must find out which parts bin it is from.


Sunday, 17 November 2013

Reversing Light

One of the things that did not work when I got the car was the reversing light. I was going to upgrade these lights to LED's  from Europa Spares (as they are modern compact little units). When I came to swap them over the reversing light had the wires disconnected. When I removed the transmission tunnel cover to find out where they should be connected there was nowhere for them to go. Now this car has an electric reverse (in the transmission tunnel) and Westfield had obviously made no provision for a reversing light switch. I pondered the insanity of wiring it up or leaving alone. Obviously it is not an MoT or IVA issue otherwise it would have been wired at some point.

Do I need one, and how should it operate if I had one?

* It balances up the light clusters at the rear
* It warns other road users of your intentions.
* Illuminates your trajectory
* Possibly useful in the pit lane.

On balance I decided to do something about it (unlike the previous owners).

I used a motorcycle brake light switch and attached it to the reversing leaver such that as soon as you move it the light comes on simple!

Contents

There is a contents page Link


Reverse light switch fabrication

Tuesday, 12 November 2013

Exhaust

The problem with the exhaust, as perceived by me, is  mainly down to noise level. However in order to pass the MSA scrutiniser it also has to be less than 99dB and have a Catalectic converter . When I purchased the car it was very noisy (even for me), however by experiment fitting some wadding brought the noise level right down. For track use, the car must have a cat being first registered in 2009. There is not much room in a Megabusa to fit a CAT so it has to take up some of the space in the exhaust. I found a 100 cell sports CAT at Demon Tweeks for £138.00. I then welded it into the front access plate of the existing exhaust. The theory being what I loose in space I gain noise attenuation with the CAT. Overall the exhaust is much quieter.

After some consideration of the appearance of my welding I decided to have it blasted (at Aliblast) and painted with high temperature paint.

Contents

There is a contents page Link


CAT welded in place

Demon Tweeks part
After blasting and painting

Reference: http://www.demon-tweeks.co.uk/motorsport/universal-exhaust-parts/custom-chrome-racing-stainless-sports-catalytic-converter

Saturday, 2 November 2013

Paddle shift

I hate the gear change on a bike engine bike gear box combination. It has the advantage of a sequential shift however it comes at a cost. It is always a bit of a hit and miss with me as I am not good at changing down without clunking the box. Ideally you have to interrupt the power on the way up and you have to match the gearbox to engine speed on the way down by blipping the throttle. This type of box is usually referred to as a DOG box. If you want an explanation see:

http://www.dansmc.com/gearbox.htm

As the Bike engine/gearbox combination is usually under more strain when installed in a car, reliability can be an issue with these boxes. The way out of all this in my opinion  is two fold:

1)  Fit a paddle shift

2) Fit a Flatshifter

The Flatshifter is a computer/ECU that specifically adds to your existing ECU the capability of clutch less up and down shifts.

I have just completed the firs part of the challenge by installing a paddle shift from AB Racing. This paddle system is cable operated and gets a good reputation in the racing world.

Several parts had to be fabricated or modified:

* Engine mount bracket designed, fabricated and brass spacer for the gear leaver turned to  restrain the cable at the engine end.
* Bracket at the steering column to restrain the cable at the other end as it is a push pull mechanical system.
* Modification of the gimbal mounting tube on the steering column as the slotted holes for my application (Austin Alegro column) are 90 degrees out.
* Nylon bush spacer as the paddle tube is 40mm ID and the Alegro column is 31.5mm. This part was turned on a lathe.
* New switches for the indicators, dip-main and horn had to be installed as the space taken up by the one piece unit from the Alegro is needed for the paddle shift.
* Old transmission tunnel parts to be removed and tunnel hole filled in. The weight saving in this operation alone is considerable.

* Shorten the steering column and weld on the quick release spigot.

Needless to say all this took some time and effort.

This exercise has at the minimum. a) Tidied up the horrible Westfield gear change in the tunnel
b) Provided a route for the possible Flatshifter. c) Added back the steering quick release at the correct distance for my driving position.

References

Link to AB racing: http://www.abperformance.co.uk/default.aspx
Paddles: http://www.abperformance.co.uk/products.aspx?cat=17
Flatshifter: http://www.abperformance.co.uk/products.aspx?cat=18

Paddle shift + tunnel tidy up

Steering column welded


Steering column bracket
Engine end bracketry

Friday, 18 October 2013

Battery, stone guards and closing panels

Battery

The bulkhead as viewed from the engine compartment, is not a tidy example of Westfield design. For reasons of space the battery, solenoid and isolator switch were all placed in or near the nearside bulkhead. With the introduction of reasonably priced compact sealed race batteries then it is time to clear away the clutter from the bulkhead and passenger foot well not to mention any weight reduction.

The battery is now housed in the nose cone on it's side (as sealed LA batteries can be). It is canted at a slight angle to assist removal at short notice. The associated electrics have be repositioned near the battery to reduce any voltage drops and ensure the car starts under all conditions. The reverse motor take-off cable had to be lengthened. The battery isolator is now attached to the engine mounting. The cleaned up bulkhead will be further enhanced at a future date.

Closing panels

The original builder obviously did not intend to come off the track. I don't know about other tracks but Knockhill runoff areas are full of pea gravel. This has the ability to get everywhere especially in any blind sections that are not closed off. One such section is just in front of the rear wheels. Once I had emptied the void of sand etc I made up closing panels and sealed them up with silicone.

Stone chip guards

I fitted some Carbon Mods stone chip guards. I am not entirely happy with the fit. This is the second lot they sent and they don't fit that much better. I guess the early stage of the bodywork is showing in terms of parts availability.

Contents

There is a contents page Link


Original as purchased


Bulkhead cleared now in nose cone


Monday, 14 October 2013

LED Lights upgrade

The appearance of the car in my opinion is let down to some degree by the rear aux lights. The rear hazard and reverse lights stuck out by about 80mm and one had previously had a knock and was cracked. The front of the car lacked any daytime running lights. All of the lights were obtained from Europa spares. They are all high intensity LED's so the power consumption is a non issue.

Contents

There is a contents page Link


Friday, 11 October 2013

Transmission tunnel

When I was fitting the near side (passenger) seat runners I noted the GRP cover over the transmission tunnel was not fitting correctly. There was some obstruction underneath near the reverse mechanism that was causing the problem. This problem is of a trivial nature but seeing the GRP cover was held on with two screws I though I would have a look at how this part of the car works. This is an early Megabusa chassis made in 2004, and I know they changed it in this area on later models so I thought it was worth a look.

The previous owner to his credit had spent a significant amount of money restoring this area and it was pleasant to reveal that he had indeed had had good value for the money spent. All the mechanicals are in perfect condition.

At least now I know what is in there and have no fears about it failing unpredictably. I think it is a good arrangement provided care is taken selecting reverse.

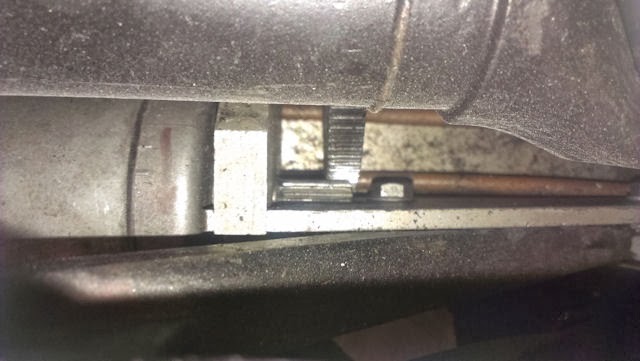
It is basically a motor bike starter (by the looks of it) and there is a cog on the interface with the diff flange which engages with the motor via a fabricated gear box (presumably by Westfield). I have downloaded some pictures so I can have a record of the investigation. The bad fitting of the GRP tunnel cover was due to a badly routed wire to the motor (5 minutes work). The problem with engagement is there is no synchronising mechanism. You have to develop your own strategy (mine is still to be perfected).

Plans

Although this is not a priority at this stage I am giving some thought to adding a paddle shift gear change and removing the existing linkage. The existing gear selector is an ugly feature on that car. This will require an upgrade to the tunnel housing. Also the reverse mechanism has no provision to turn on a reversing light although one is present on the car.

Contents

There is a contents page Link

The rubber boots need refreshing being badly cracked.
Gear selector

Handbrake boot

Reverse drive gear

Reverse motor

Reverse solinoid

Reverse selector gear

View towards engine